Lookup Customer
The Lookup Customer function is used to search the customer database. Lookup Customer can also be used to add a new customer to the database, add an existing customer to a check, register a fingerprint, view the customer's picture, and edit customer data.
 How to Create a "Lookup Customer" Button
- In Button Maintenance, select Lookup Customer from the Function drop-down.
- Click Edit Function Data.
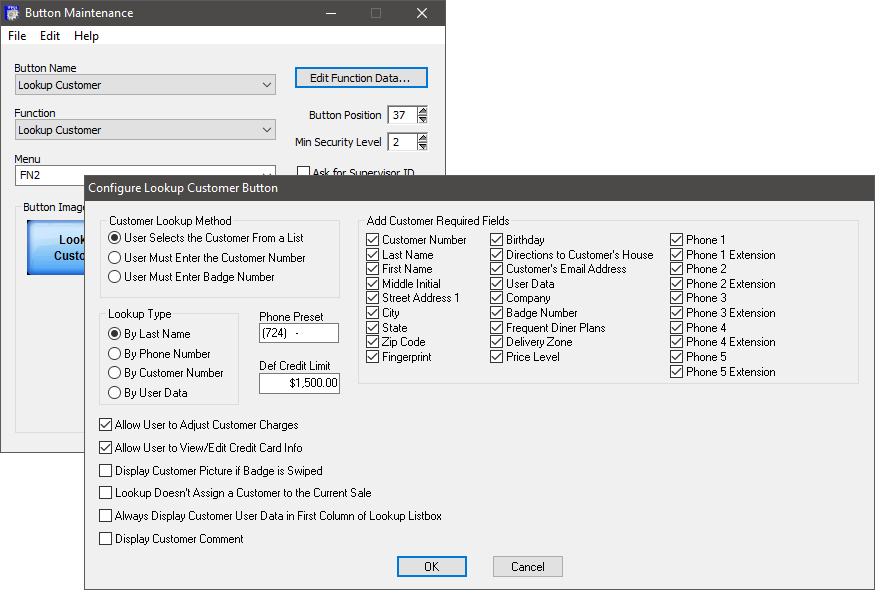
- Select your preferred settings and then click OK.
- Select your preferred Customer Lookup Method:
- User Selects the Customer From a List Allows the user to select the customer from a list box on the Front End.
- User Must Enter the Customer Number prompts the user to enter the customer's assigned number on the Front End.
- User Must Enter Badge Number allows the user to swipe a magnetic card that is assigned to the customer.
- Select your preferred Lookup Typeby: Last Name, Phone Number, Customer Number, or User Data.
- If desired, enter the Phone Preset. The Phone Preset is the default area code which will appear when you add a new customer. You can also change the phone preset in the Front End.
- If desired, enter the default credit limit in Def Credit Limit. The Def Credit Limit will be the credit limit for every new customer you add using the button. Credit limits can viewed in Customer Maintenance when the Customer List is generated.
- Check the box next to the desired options below:
- Allow User to Adjust Customer Charges: Allows the user to view the charge history of and add positive and negative adjustments to a customer's account.
- Allow User to View/Edit Credit Card Info: Allows the user to view/edit the customer's credit card info.
- Display Customer Picture if Badge is Swiped: Displays customer's photo.
- Lookup Doesn't Assign a Customer to the Current Sale: Allows the user to look up the customer but does not assign the customer to the current sale.
- Always Display Customer User Data in First Column of Lookup Listbox: Displays the information stored in the User Data field.
- Display Customer Comment: Displays the customer comment stored in Customer Maintenance. The comment will display after selecting a customer and clicking OK.
- Check the box next to the customer fields you want to appear when adding a new customer from the Front End. The customer fields are explained in Customer Maintenance.
- Select the Menu and set the Button Position. If desired, set the Min Security Level, Width, Height, Button Appearance and Ask for Supervisor ID. See General Button Maintenance Functions for an overview about the general fields.
- Click the button to modify the button attributes.
- Click File > Save As.
- Type a name for the button in the field labeled .
- Click OK.
Open topic with navigation