Configuring Other Windows OS for Future Fusion
Other Microsoft Windows Operating Systems
Users must configure Microsoft
Windows OS settings for use as a FPOS Server, Backup Server, and Terminals.
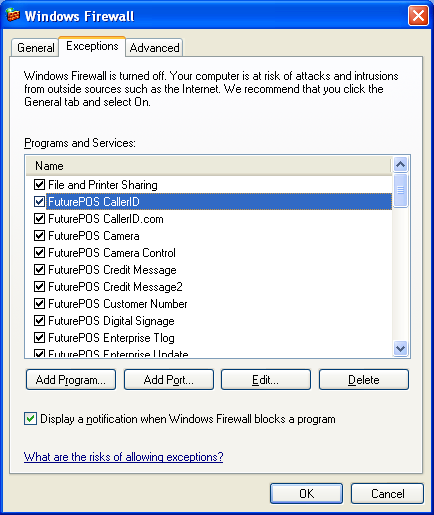
 How to Configure Windows Firewall Program Exceptions
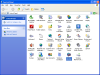
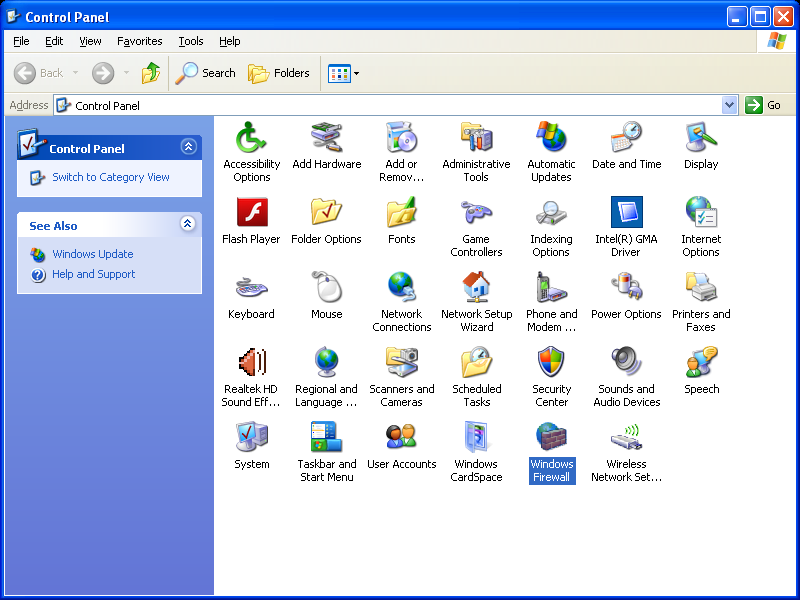
- From the home screen of Windows, click Start > Control Panel.
- Click the Windows Firewall option.
- When the Windows Firewall dialog opens, click the Exceptions tab.
- Check the check box to the left of the programs that should be exceptions to firewall rules. Be sure to allow all FuturePOS programs and SQL programs.
- Then click the OK button.
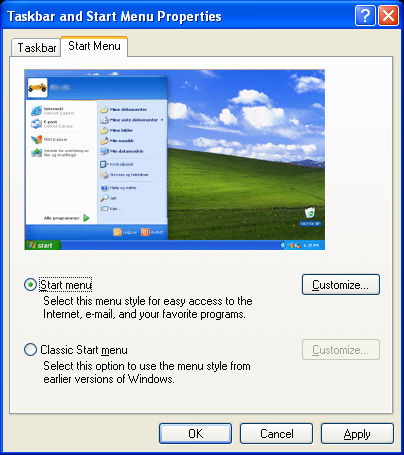
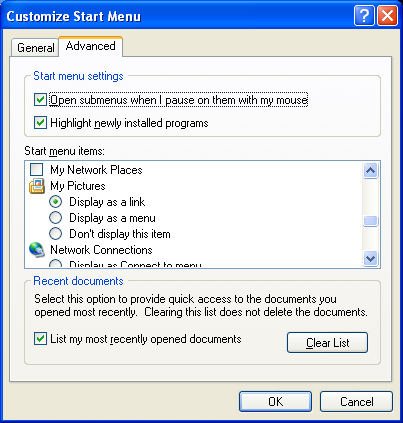
How to Configure the Start Menu (Optional)
- From the Windows home screen, right-click the taskbar.
- Click the
Properties option.
- When the Taskbar and Start Menu Properties window opens, click the Start Menu tab.
- Click the Customize button.
- Click the Advanced tab.
- In the Start menu items list box, check the My Network Places option, then click OK.
- Click OK to close the Taskbar and Start Menu Properties window.
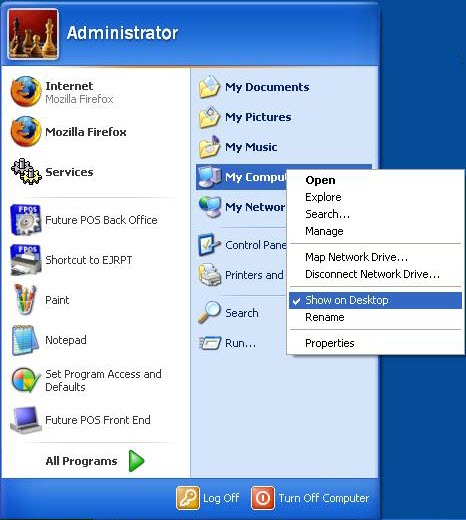
How to Configure Power Management Settings (Optional)
- From the Windows home screen, click Start.
- Right click My Computer and then click the Show on Desktop option.
- Right click My Network Places and then click the Show on Desktop option. .
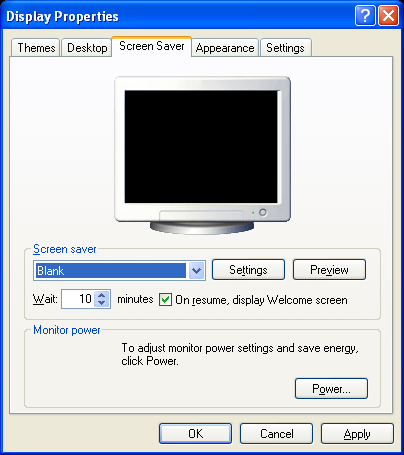
- Right click the desktop and select the Properties option.
- In the Display Properties window, click the Screen Saver tab.
- Select a Screen saver from the drop down.
- Enter a Wait time. This is the number of minutes the machine must be idle before the screen saver will display.
- Uncheck the On resume, display Welcome screen option.
- In the Monitor power section, click the Power button.
- When the Power Options Properties window opens, click the Power Schemes tab.
- Configure the terminal's power scheme:
- In the Turn off monitor drop down, select After 1 Hour.
- In the Turn
off hard disks drop down, select Never.
- In the System standby drop down, select Never.
- In the System hibernates drop down, select Never. This drop down will only be displayed if hibernate mode has been enabled from the Hibernate tab.
- Click the OK button.
- In the Display Properties window, click the OK button.
How to Configure Auto Log On (Optional)
Setting the Administrator Password
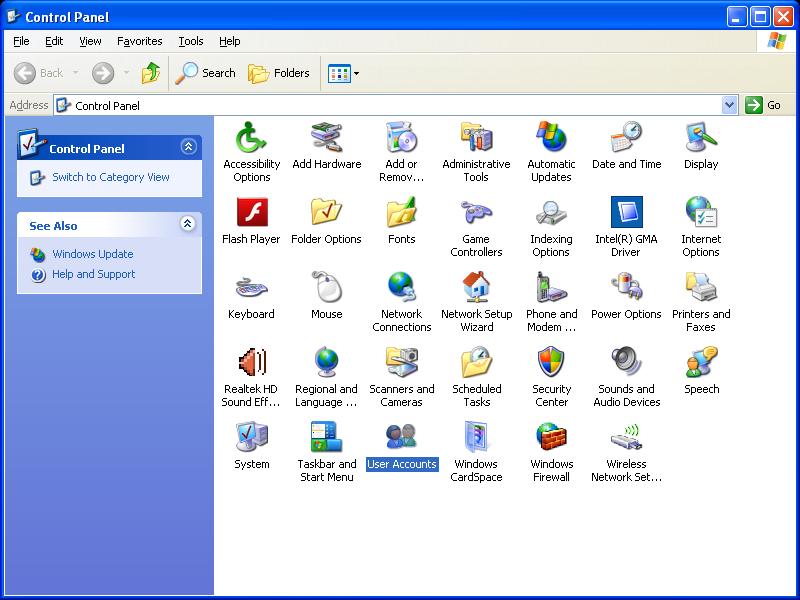
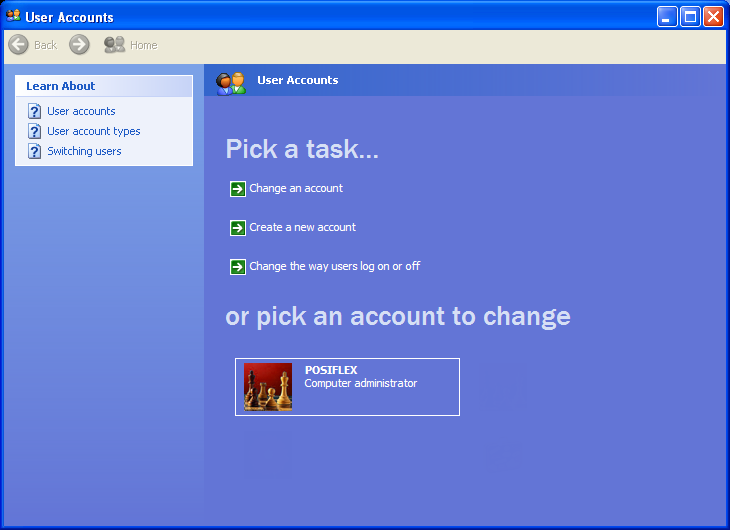
- From the home screen of Windows, click Start > Control Panel.
- Click the User Accounts option.
- Click the Computer administrator icon.
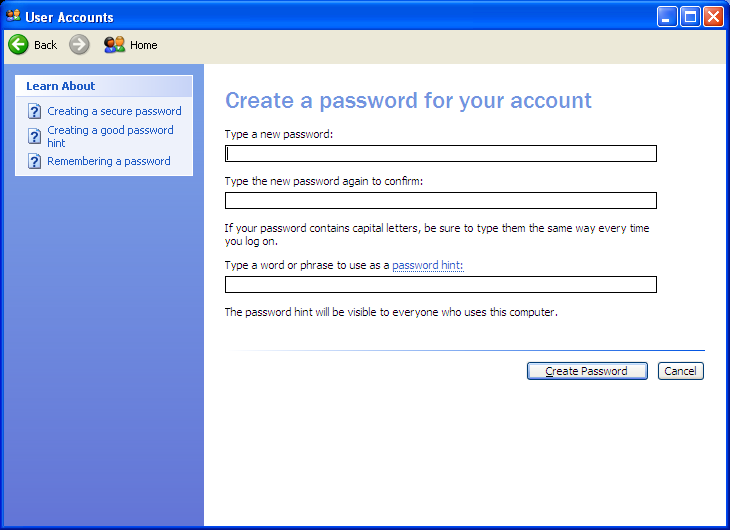
- Click the Create Password link.
- Enter a new password, then click OK.
Configuring the Auto Log On Settings
- Click Start button.
- Click Run.
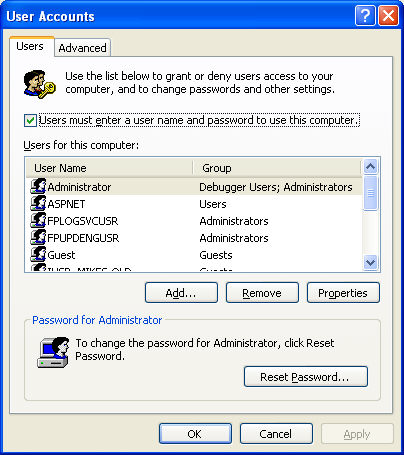
- Enter control userpasswords2 into the text
field and click OK.
- In the User Accounts dialog, check the Users must enter
a user name and password to use this computer and click Apply.
- Uncheck the Users must enter
a user name and password to use this computer option, then click OK.
- When the Automatically Logon dialog opens, enter Administrator as the User, then enter the new password.
- Click the OK button.
How to Configure Network Shares and Permissions (Optional)
- Open Windows Explorer.
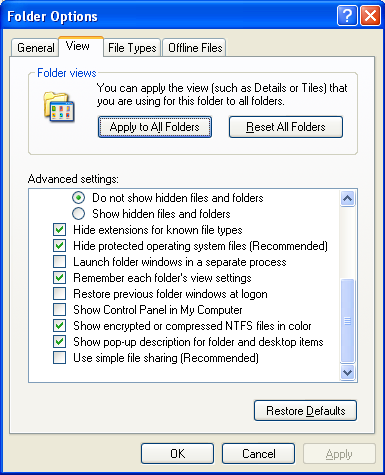
- Click Tools > Folder Options.
- Click the View tab.
- In the Advanced settings list box, uncheck the Use simple file sharing
(Recommended) option.
- Click OK.
- Open My Computer.
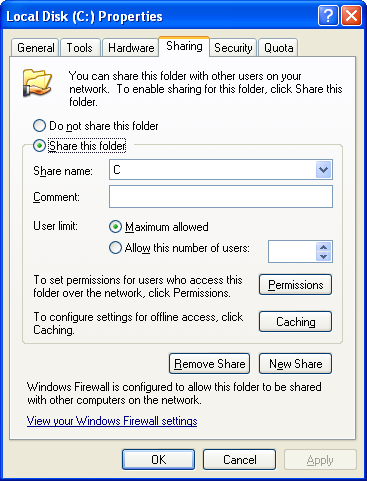
- Right click the C: drive and select the Properties option.
- Click the Sharing tab.
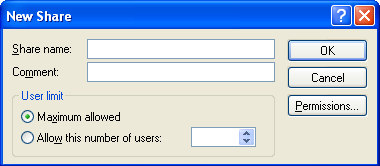
- Click the New Share button.
- Enter a Share name.
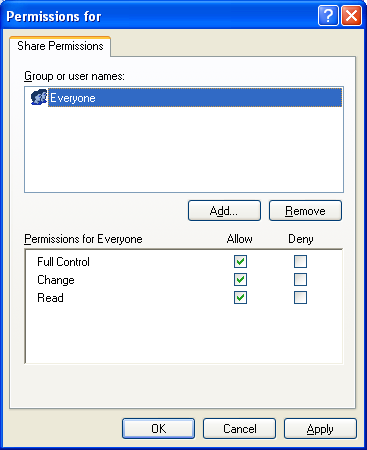
- Click the Permissions
button.
- The Permissions for (Share name) window will appear.
- In the Group or user names list box, highlight the Everyone
option.
- In the Permissions for Everyone list box, check the Allow Full Control and then click OK.
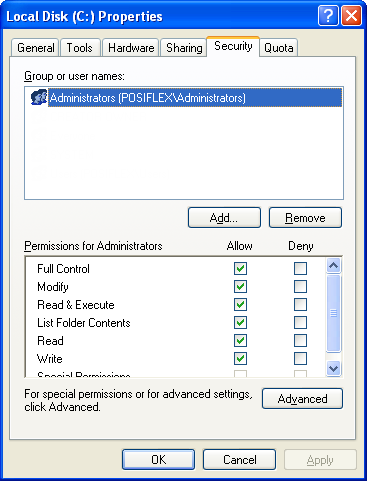
- In the Properties window, click the Security
tab.
- Click the user group Everyone and click Full Control.
- Click OK.
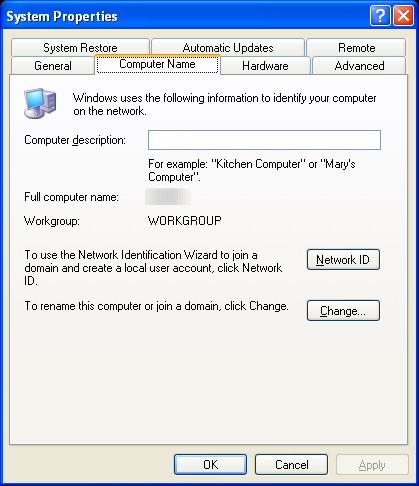
How to Configure the Computer Name (Optional)
- From the Start Menu, right click My Computer.
- Click the Properties option.
- When the System Properties window opens, click the Computer Name tab.
- Enter a computer name in the Computer description field.
How to Configure the IP Address (Optional)
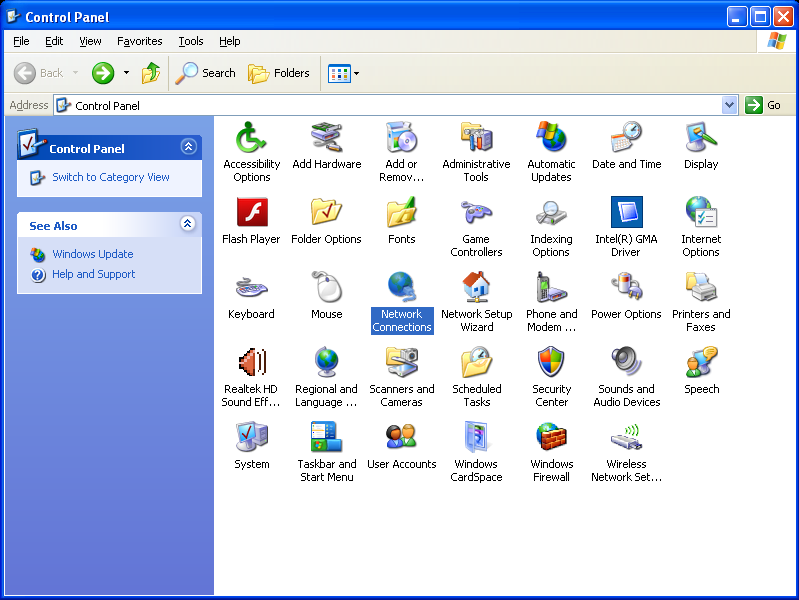
- From the Start Menu, open the Control Panel.
- Right click Network Connections.
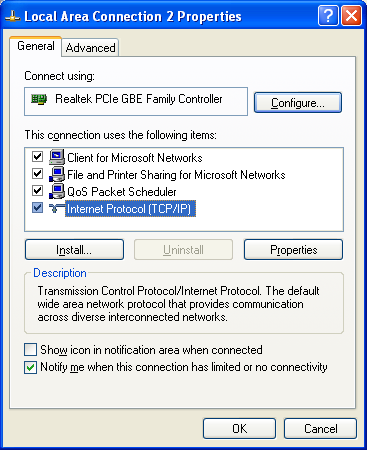
- Click the Properties option.
- When the Local Area Connection Properties window opens, highlight the Internet Protocol option in the connection list box.
- Click the Properties button.
- When the Internet Protocol Properties window opens, enter the IP Address settings. The FPOS software requires a static IP address.
- Click the OK button to save the IP address settings.
- Click OK in the Local Area Connection Properties window to save the changes.
Open topic with navigation