Configuring Windows OS Future Fusion
Microsoft Windows 7
Users must configure Microsoft Windows 7 settings for use as a FPOS Server, Backup Server, and Terminals.
 How to Configure User Account Settings
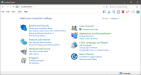
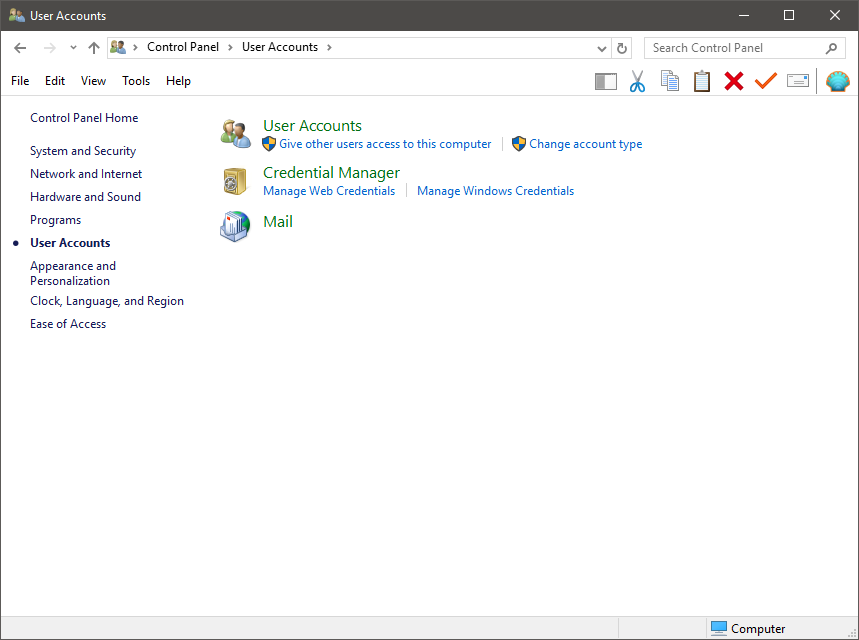
- From the home screen of Windows, click Start > Control Panel.
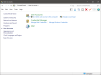
- Click the User Accounts option.
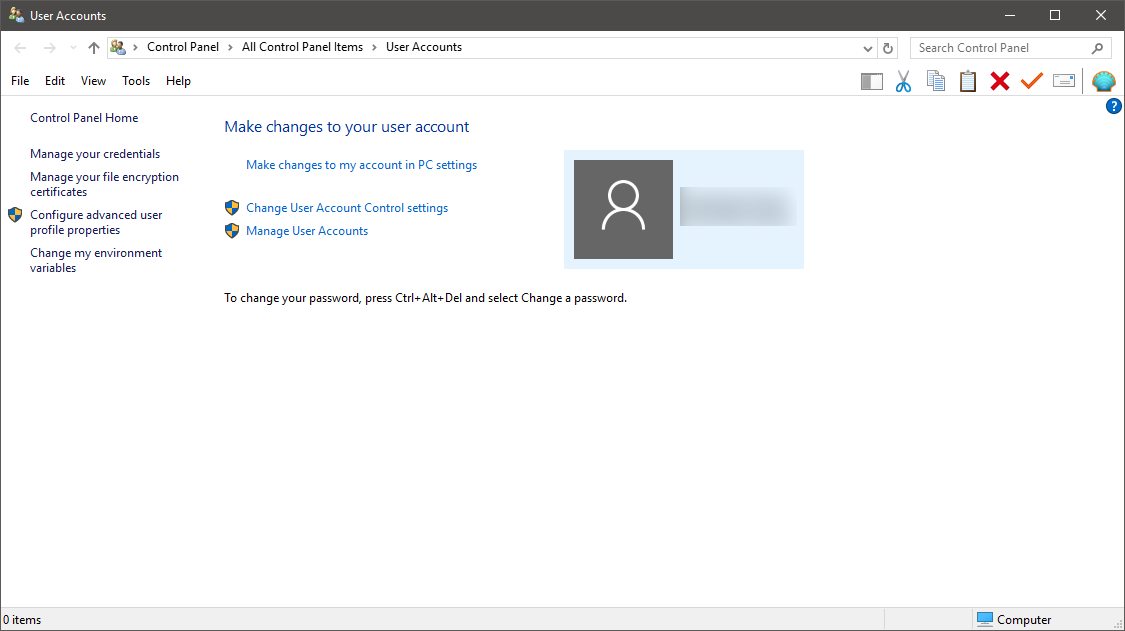
- Click the User Accounts option.
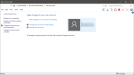
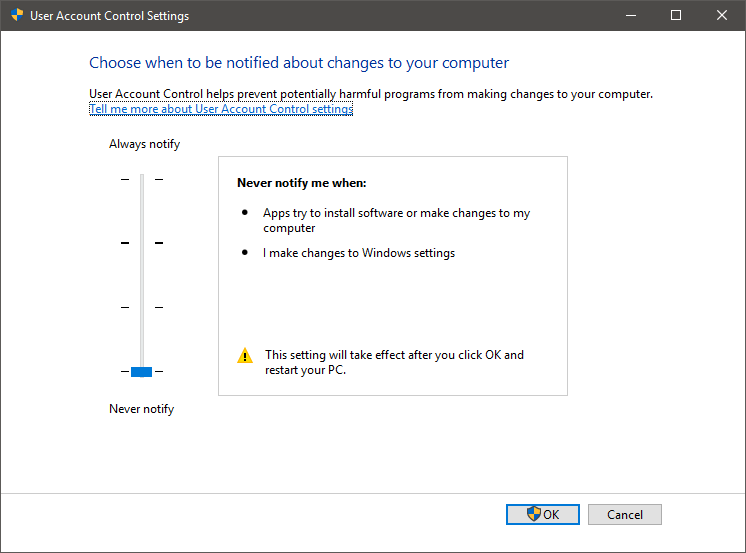
- Click the Change User Account Control settings link.
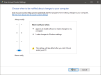
- Click and drag the slider to Never notify.
- Click the OK button to apply the configuration changes. Reboot the computer for the change to take effect.
How to Install Windows Updates
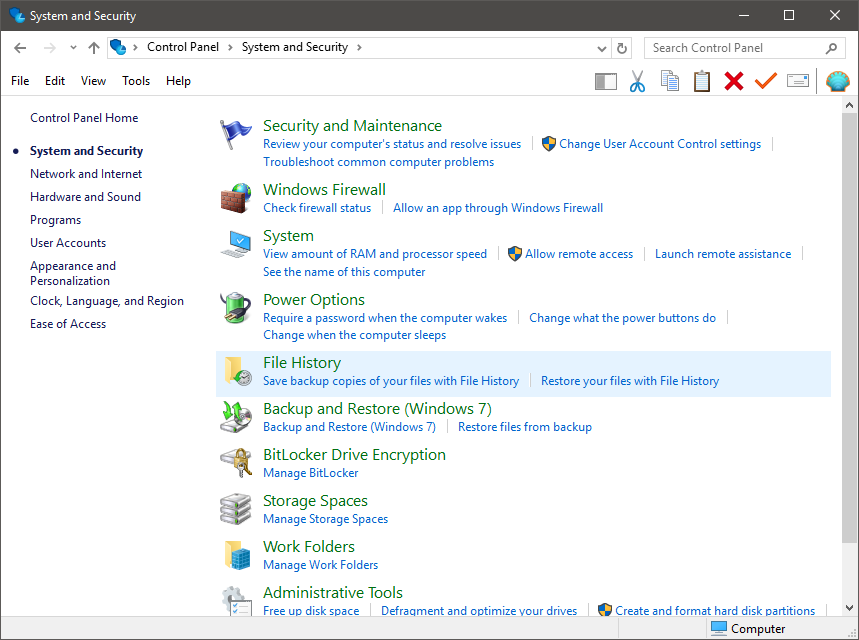
- From the home screen of Windows, click Start > Control Panel.
- Click the System and Security option.
- Click the Windows Update option.
- If updates are available, click the Install updates button.
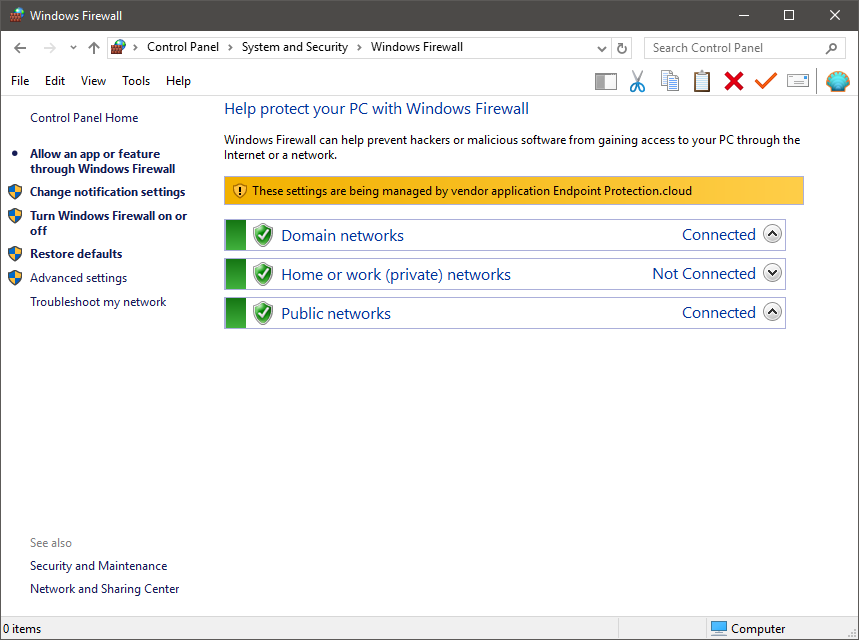
How to Configure a Windows Firewall Program Exception
- From the home screen of Windows, click Start > Control Panel.
- Click the System and Security option.
- Click the Windows Firewall option.
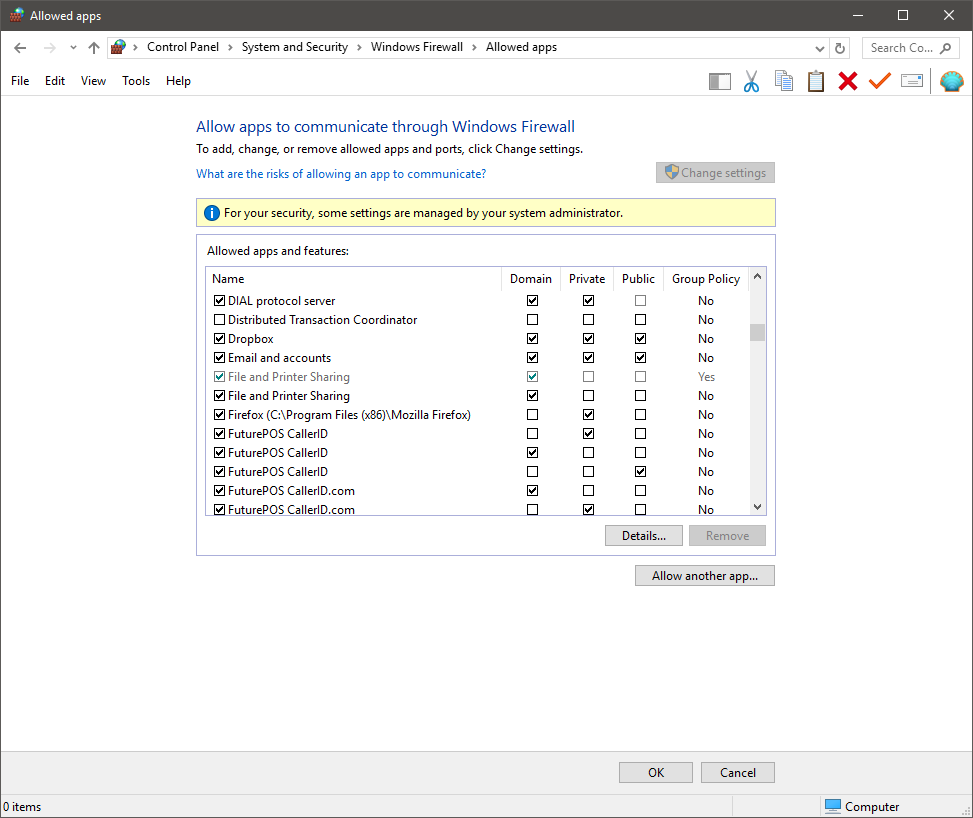
- Click the Allow a program or feature through Windows Firewall link.
- Check the check box to the left of the programs that should be exceptions to firewall rules. Be sure to allow all FPOS programs and SQL programs.
- Click the OK button.
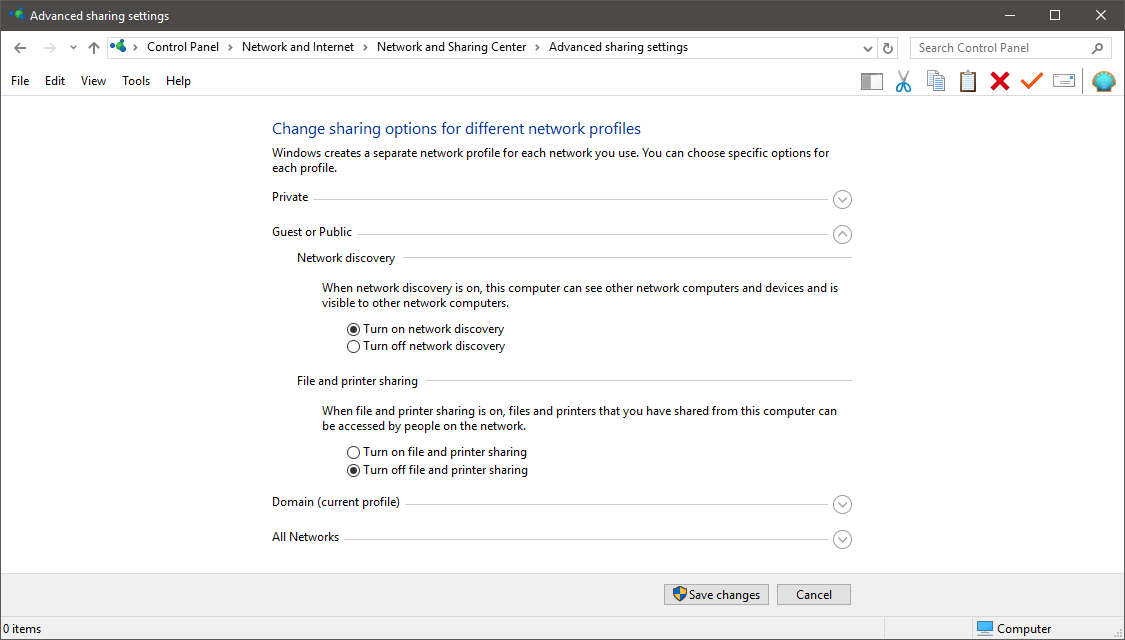
How to Configure Advanced Sharing Options (Optional)
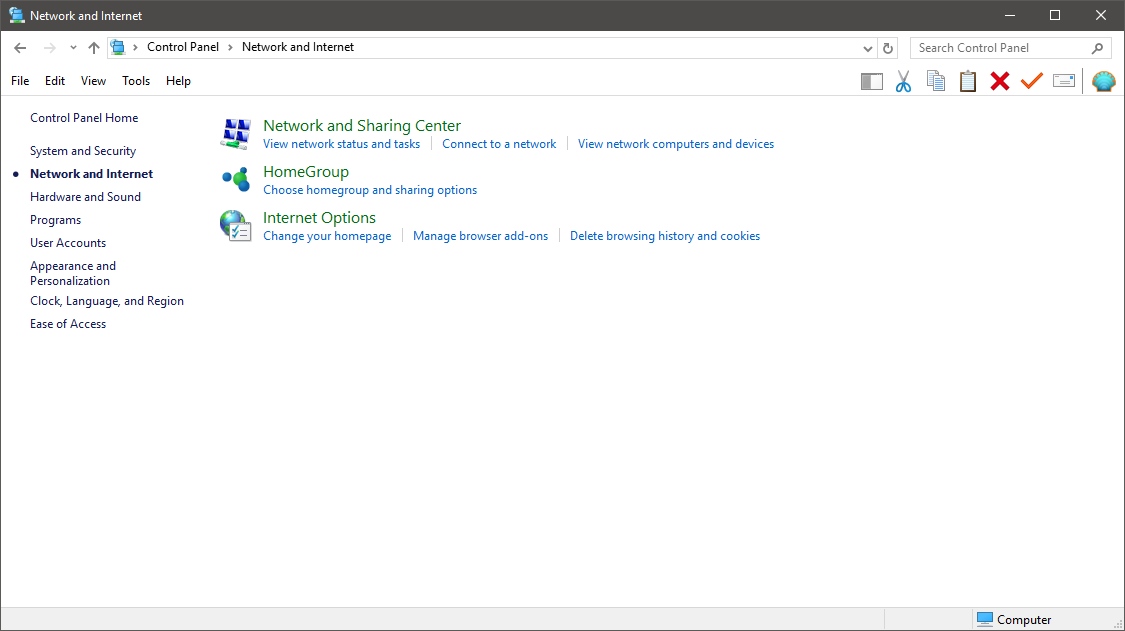
- From the home screen of Windows, click Start > Control Panel.
- Click the Network and Internet option.
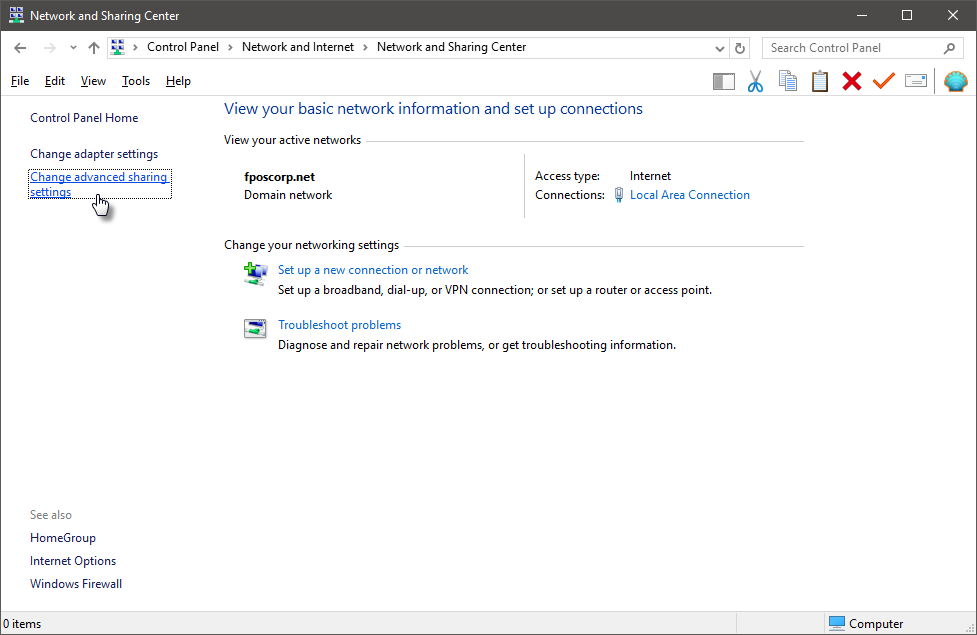
- Click the Network and Sharing Center option.
- In the sidebar, click the Change advanced sharing settings link.
- Select a Network Profile.
- Click the Turn on network discovery radio button.
- Click the Turn on sharing so anyone with network access can read and write files in Public folders radio button.
- Click the Enable file sharing for devices that user 40- or 56- bit encryption radio button.
- Click the Save Changes button to apply the configuration changes.
How to Configure the Start Menu (Optional)
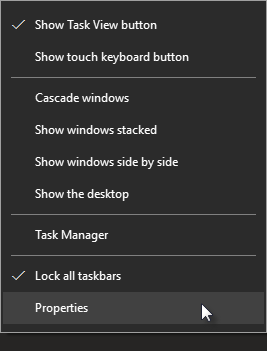
- Right click the taskbar and select the Properties option.
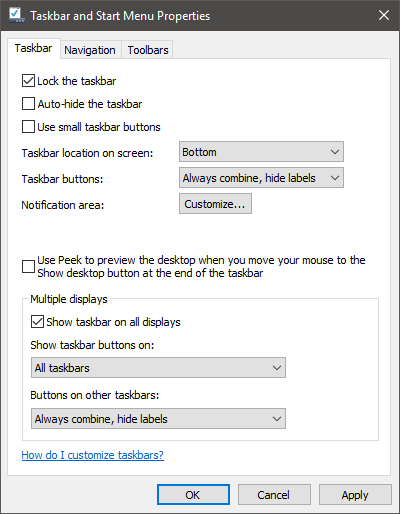
- Click the Start Menu tab.
- Click the Customize button.
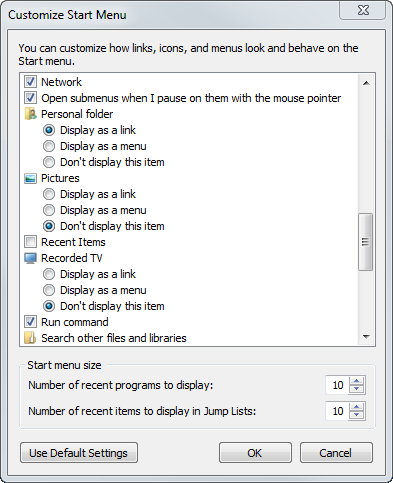
- In the settings list box:
- Enable the Network and Run Command options by checking the check boxes to the left of each option.
- Set Default Programs, Music, and Pictures to Don't display this item.
- Click the OK button to apply the configuration changes.
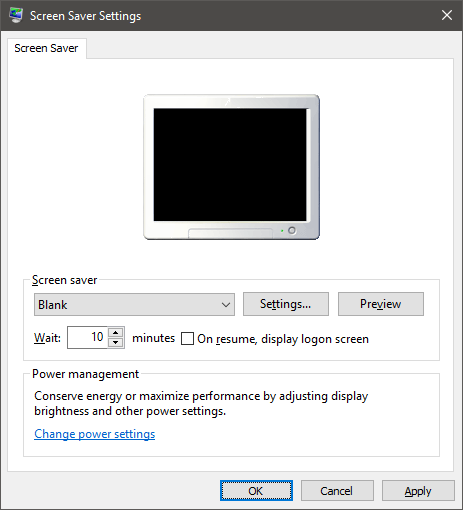
How to Configure Power Management Settings (Optional)
- From the home screen of Windows, right click on the desktop and select Personalize.
- Click the Screen Saver option.
- Select a Screen saver from the drop down.
- Enter a Wait time. This is the number of minutes the machine must be idle before the screen saver will display.
- Uncheck the On resume, display logon screen option.
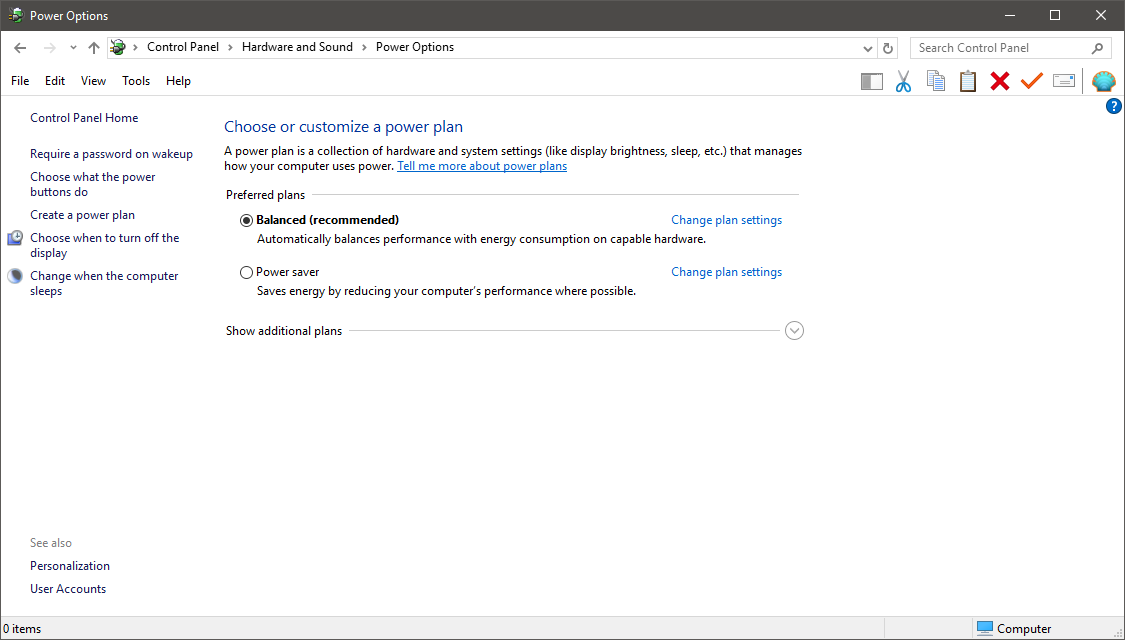
- In the Power Management section, click the Change power settings link.
- Select the Balanced (recommended) radio button.
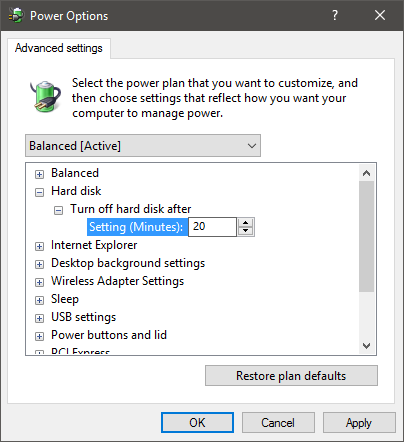
- Then click the Change plan settings link.
- Click the Change advanced power settings link.
- Expand the Hard Disk option. Select Never from the Turn off hard disk after control box.
- Click the OK button to apply the configuration changes.
How to Configure Auto Log On (Optional)
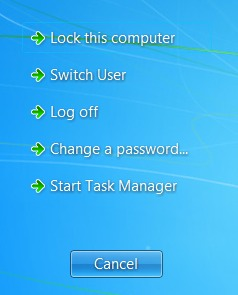
- First, change the account password. Press Ctrl+Alt+Del and select the Change Password option.
- Enter the User name, Old password, New password, and then confirm the new password in the Confirm password field.
- Click the Arrow button to change the password.
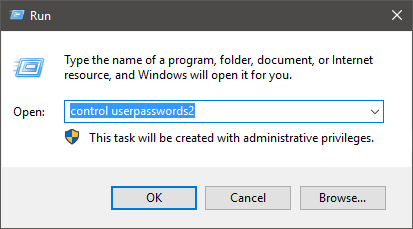
- From the home screen of Windows, click Start > Run.
- Enter control userpasswords2 in the text field then click OK.
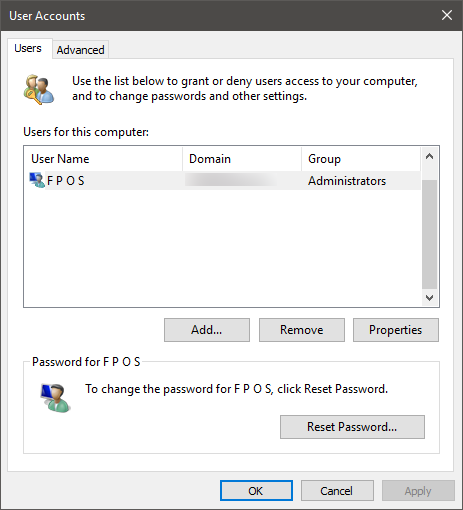
- Uncheck the Users must enter a user name and password to use this computer check box then click the OK button.
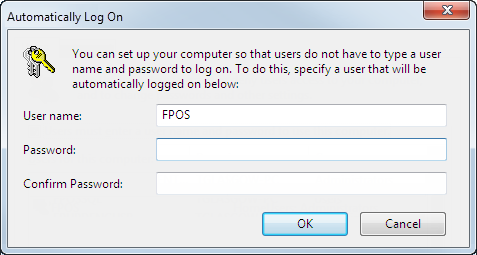
- When the Automatically Log On dialog appears, enter the User Name and password you configured in Step Two of Setting the Administrator Password.
- Click the OK button.
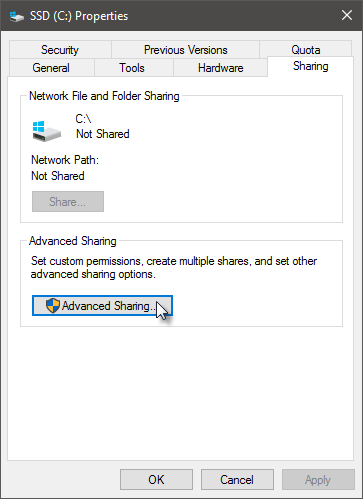
How to Share the C Drive (Optional)
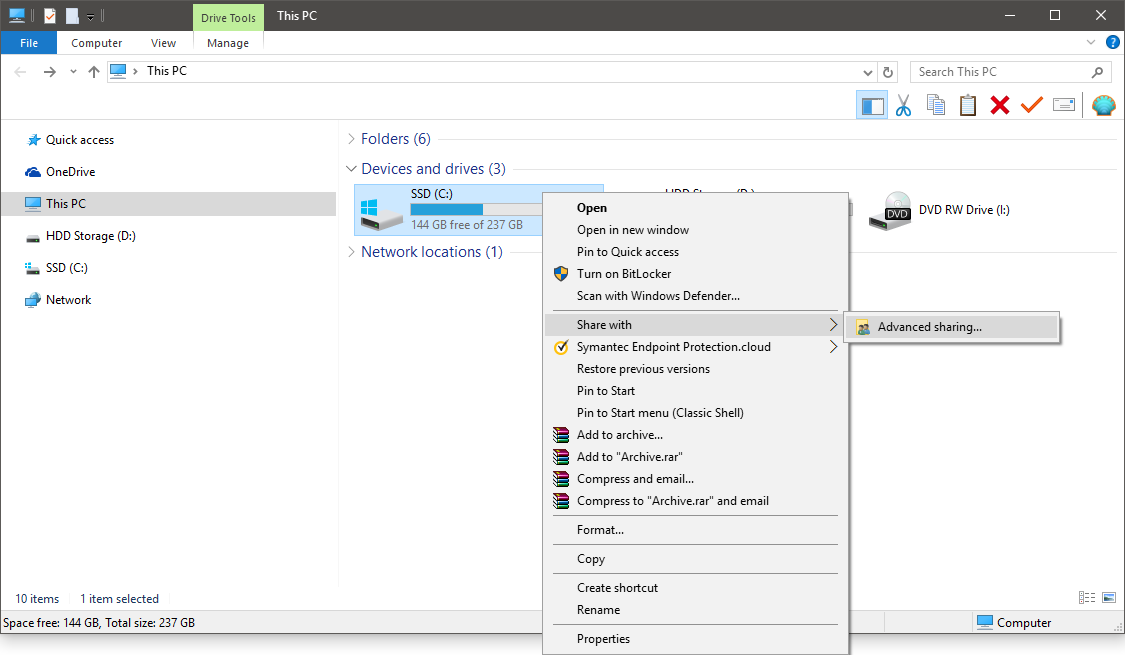
- From the home screen of Windows, click Start > Computer.
- Right click on Local Disk (C:) and highlight the Share with option.
- Click the Advanced sharing option from the submenu.
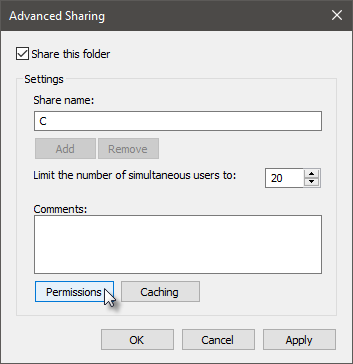
- In the Local Disk (C:) window, click the Advanced Sharing button.
- Check the Share this folder check box. The Share name should populate with "C".
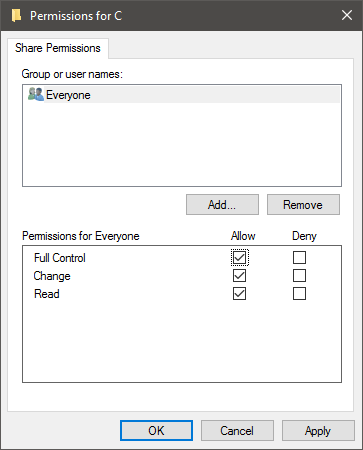
- Click the Permissions button.
- In the Group or user names list box, select the Everyone option.
- Check the Allow Full Control check box.
- Click the OK button to apply the configuration changes.
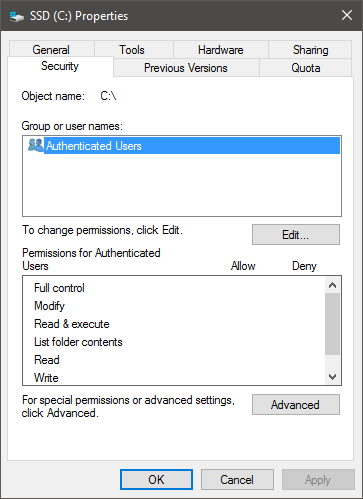
- In the Local Disk (C:) window, click the Security tab.
- In the Group or user names list box, highlight the Administrators option.
- Verify that Allow Full Control for Administrators is checked in the Permissions for Administrators list box. If Full Control is not enabled, click the Edit button to configure permissions.
- After verifying settings, click the Close button.
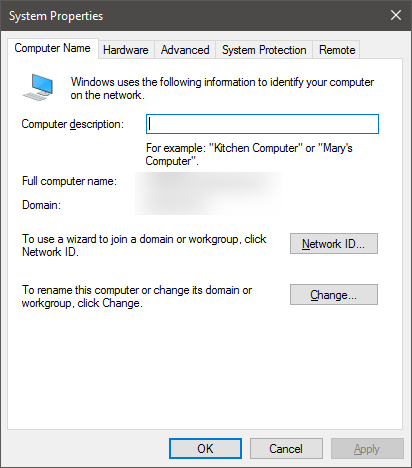
How to Configure the Computer Name (Optional)
- From the Start Menu, click Control Panel.
- Select the System and Security option.
- Click the System option.
- In the Computer name, domain, and workgroup settings section, click the Change settings link.
- Enter a computer name in the Computer Description field.
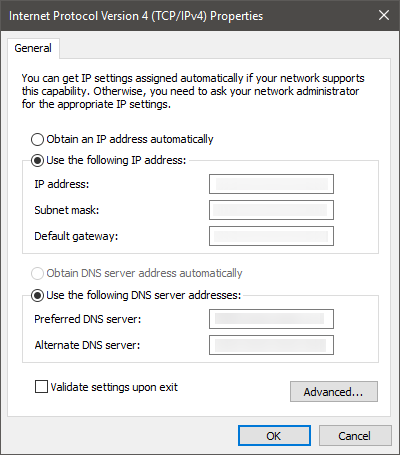
How to Configure the IP Address (Optional)
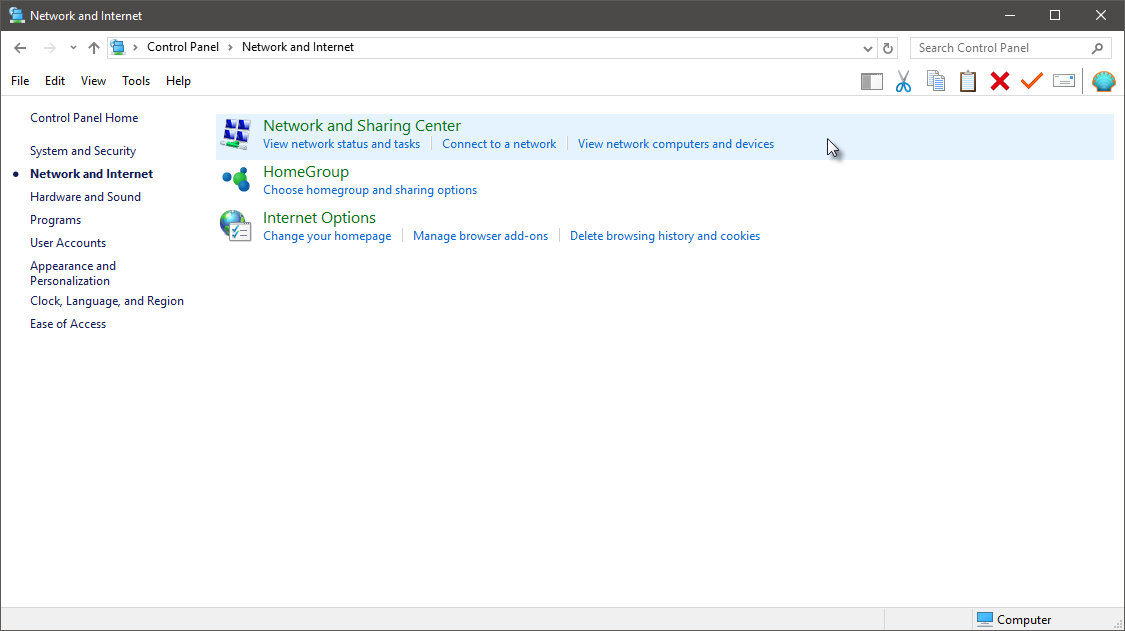
- From the Start Menu, open the Control Panel.
- Select the Network and Internet option.
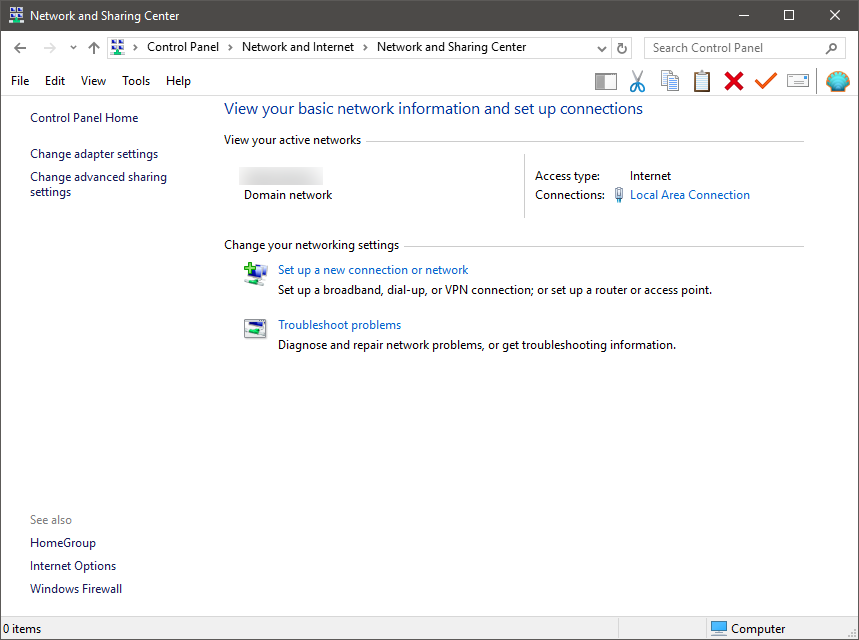
- Click the Network and Sharing Center option.
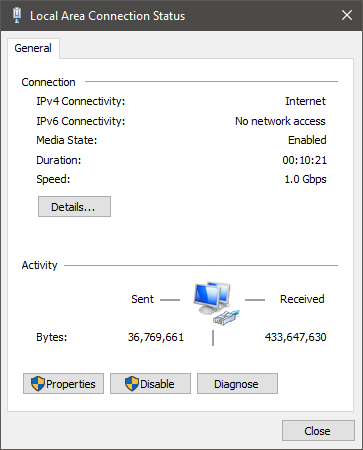
- Click the Local Area Connection link.
- In the Local Area Connection Status window, click the Properties button.
- In the Local Area Connection Properties window, highlight the Internet Protocol Version 4 (TCP/IPv4) option, then click the Properties button.
- When the Internet Protocol Properties window opens, enter the IP Address settings. The FPOS software requires a static IP address.
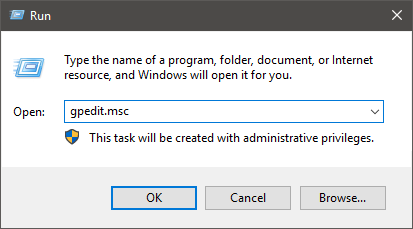
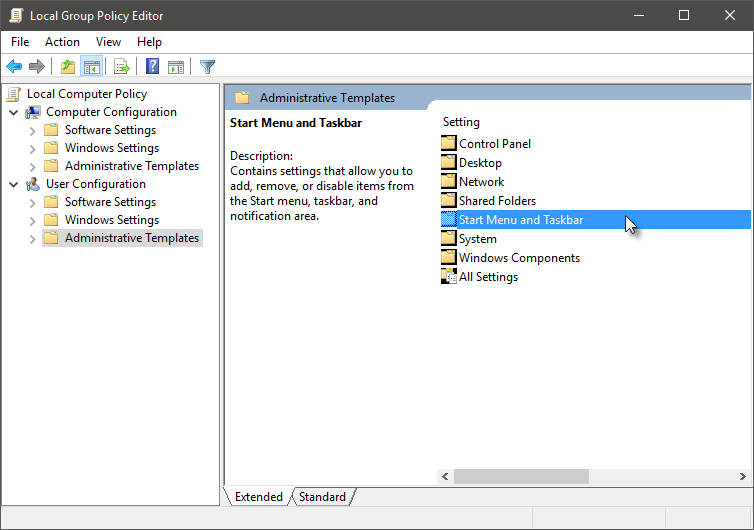
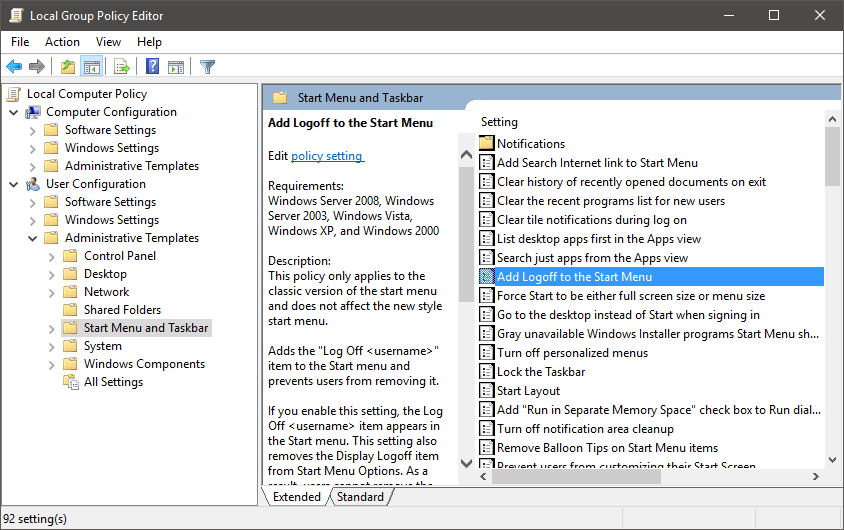
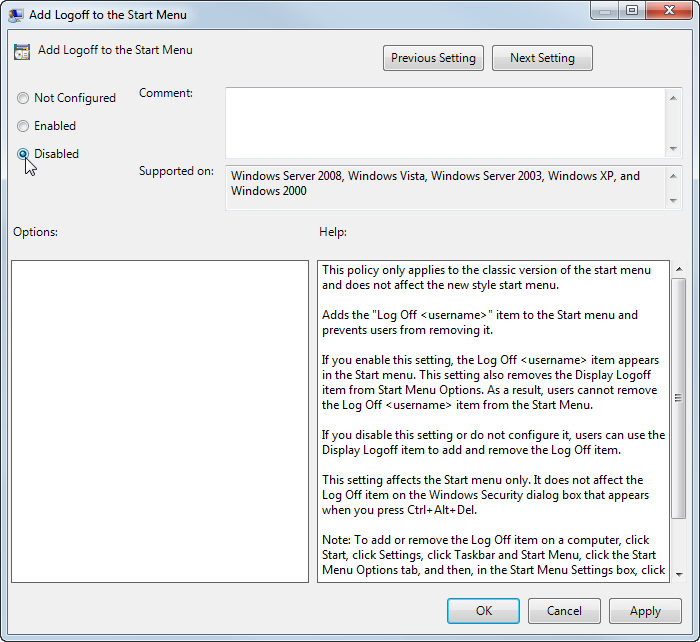
How to Remove Logoff from the Start Menu (Optional)
- From the home screen of Windows, click Start > Run.
- Enter gpedit.msc in the text field.
- Click the User Configuration > Administrative Templates folder.
- Double click the Start Menu and Taskbar folder in the preview pane.
- Double click the Add Logoff to the Start Menu option.
- In the Add Logoff to the Start Menu window, click the Disabled radio button.
- Click OK to apply the setting change. Reboot the computer for the change to take effect.
Open topic with navigation