Creating a New Scheduled Update
Users can create scheduled updates using Scheduled Updates Maintenance in the Back Office of the Enterprise Server. Scheduled Updates will push Maintenance changes to the stores within the region selected when logging in to the Enterprise server.
When creating scheduled Maintenance updates, users can begin either in the respective Maintenance, making Maintenance configurations and then creating the schedule for the changes or users can begin in Scheduled Updates Maintenance and select the Maintenance they would like to configure after creating a Schedule Group. The instructions below begin by adding a Schedule Group to Scheduled Updates Maintenance and then moves on to configuring Maintenance options. Button Maintenance is used in this example.
 How to Create a New Scheduled Update from Scheduled Updates Maintenance
- From the Enterprise Server, open the Back Office.
- Click the Maintenances
icon.
- Click Scheduled Updates.
- In the Scheduled Update Maintenance window, click the File menu.
- Click the New Scheduled Update option.
- In the Select/Edit Schedule Group window, click the Add button to add a new Schedule Group.
- Enter a Schedule Group Name in the text box.
- Enter a Schedule Group Date. This value will default to 1 minute if not set. In this example, we set the date to December 20, 2013 at 6:00AM.
- Click the new Schedule Group and then click the Select button.
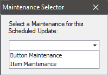
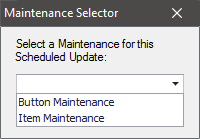
- In the Maintenance Selector window, choose a Maintenance from the drop down. Enterprise Scheduled Update currently supports Button, Item, and Department Maintenances.
- Once you have selected a Maintenance, click the Launch button to launch the respective Maintenance. See To Create a Scheduled Update below for more information on creating a scheduled update.
How to Create a Scheduled Update from a Maintenance
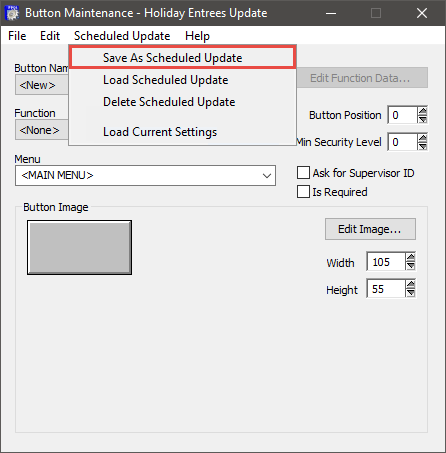
- Configure the Maintenance update. In this example, a new Sell Item button is created in Button Maintenance.
- Click the Scheduled Update menu.
- Click Save as Scheduled Update.
- Select the Schedule Group you created in Step 7 from the Schedule Group Name list.
- Click the Select button.
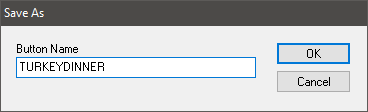
- If the button is a new button, enter a Button Name in the Save As window when prompted.
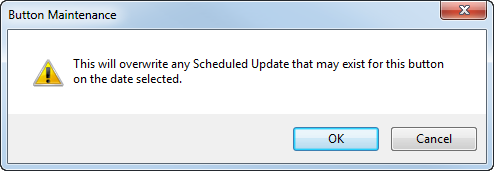
- When the overwrite Schedule Update warning appears, click the OK button to save your new button.
Open topic with navigation