Processing with Paymentech
Users can configure Paymentech processing after purchasing the processor via the Web Store. Any Future POS licenses originally purchased on or prior to January 22, 2014, will be eligible for a free upgrade for PPM if it is upgraded prior to December 31, 2014. After that date, existing customer installations will be charged at regular rates.
Once purchased, the merchant can utilize the direct interface to the Paymentech integrated payment processor. Dealers will need to configure Paymentech processing for their merchant using the Dealer Portal.
 About Paymentech Processing
- Interfaces with FPOS via the Credit Card Module
- Tips, refunds, and voice authorizations are offline
- Batch close sends all transactions and auto captures
- Zip code entry required for manually entered cards
- Requires the use of .NET Framework 4.5.1
- Cannot be used on XP or embedded versions of XP due to the requirement of .NET Framework 4.5.1
Supported Functions
- Pre-Auth/Pre-Auth Capture
- Partial Authorization
- Credit Card Balance Inquiry
How to Configure Paymentech Payment Processing in the Back Office
- Open the Back Office.
- Click the Settings icon.
- Select System Settings. The Credit/Debit/Gift tab will be displayed by default.
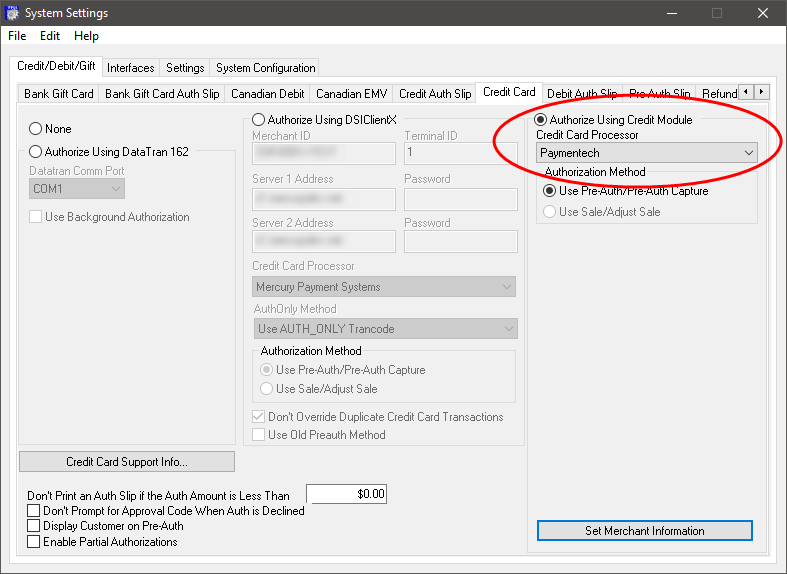
- Click the Credit Card tab.
- In the Credit Card tab, click the Authorize Using Credit Module radio button to enable processing with Credit Module.
- Select Paymentech from the Credit Card Processor drop down.
- The Use Pre-Auth/Pre-Auth Capture Authorization Method is selected by default. This option requires the user to enter a charge tip on each check before batching out.
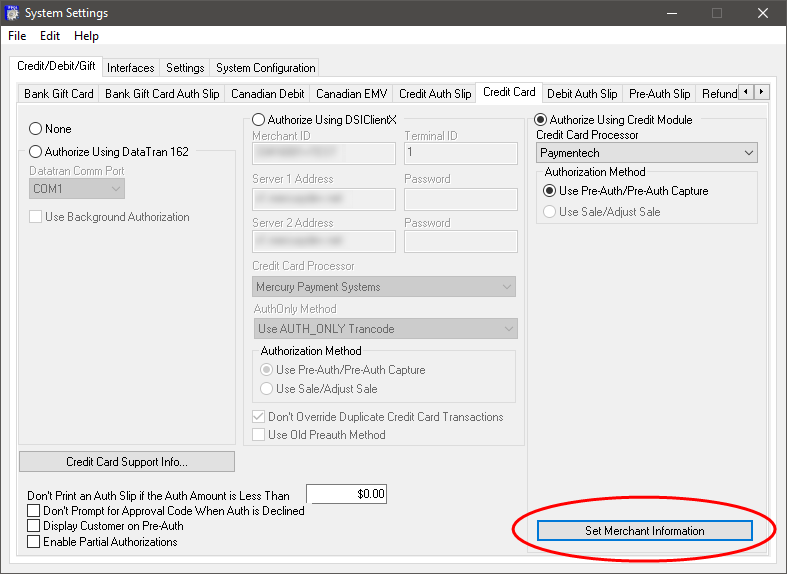
- Click the Set Merchant Information button.
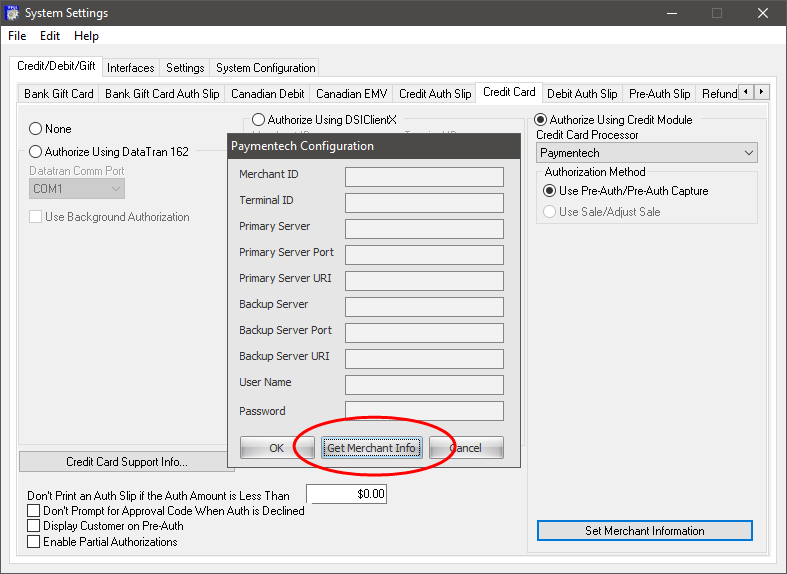
- When the Paymentech Configuration window opens, click the Get Merchant Info button to allow FPOS to populate the credit card processor information previously entered in the Dealer Portal.
- Click the OK button to return to save the processor settings and return to the System Settings window.
- Once the processor information fields have been configured, click File > Save to save and apply credit card settings.
How to Configure General Credit Card Options
- In the Credit Card tab, click the Credit Card Support Info
button. Any text entered will be displayed within the Support Info window of the active credit card module.
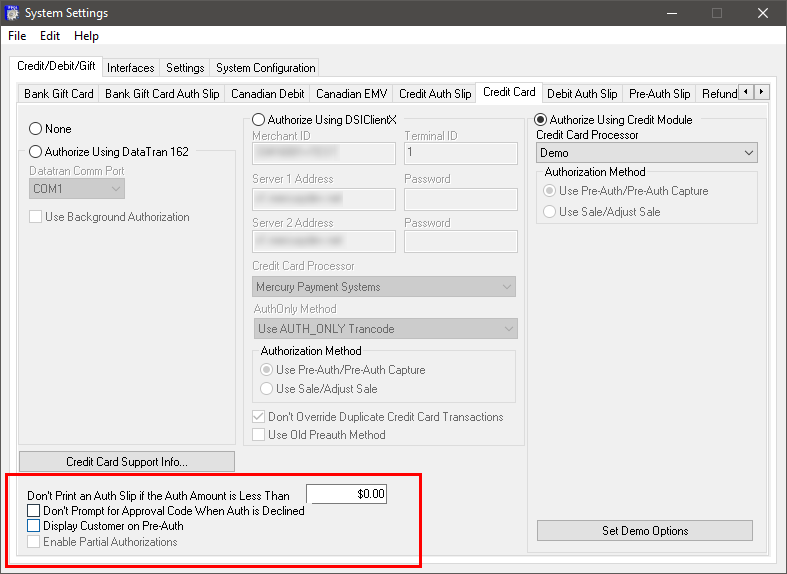
- The Don't Print an Auth Slip if the Auth Amount is Less Than option allows the user to specify when authorization slips will be printed. Any amount less than the dollar amount entered will not print an authorization slip at the time of the sale.
- Check the Don't Prompt for Approval Code When Auth is Declined check box to prevent the module from prompting for an approval code. The user will be required to perform the card swipe again.
- Check the Display Customer on Pre-Auth check box to display the customer's name on the pre-authorization approval notification.
-
Check the Enable Partial Authorizations option to settle a portion of a sale using the balance of a Visa or MasterCard gift card. The user will also be prompted to enter the remaining portion of the sale with an alternative media. If this option is unchecked, cards pre-authorized, but not containing the full amount of the sale, will be declined. This option is only available for selected processors including Cayan, EMS, Global, Jet Pay, Paymentech, Sterling, and Tsys.
- In the System Settings window, click File > Save to save and apply the credit card settings.
Open topic with navigation